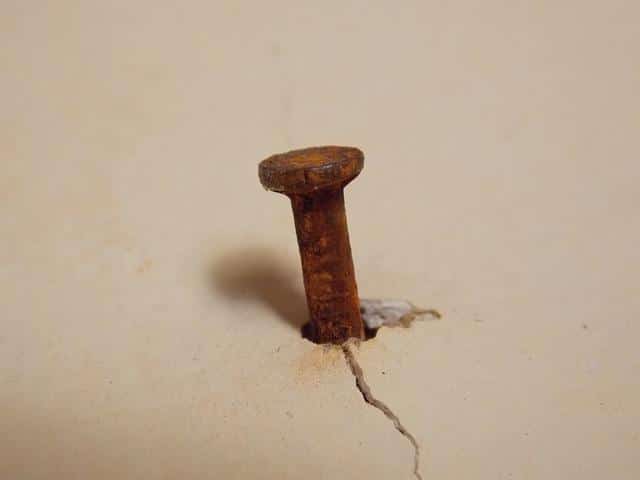
If you’ve ever noticed a small, raised bump in your ceiling, chances are you have a nail pop. Although they’re not serious, nail pops can be unsightly and even become a safety hazard if left unprepared.
Fortunately, repairing nail pops is a relatively easy do-it-yourself project. In a few easy steps, you’ll learn how to solve the problem with the help of this guide. In that case, if you’re anxious to get away from those bothersome nail pops, keep reading!
What Causes Nail Pops in Ceiling?
Nail pops are a common problem in both new and old homes. They occur when nails work out of the drywall, causing the wall to bulge or ripple. It can happen for several reasons, including:
Drywall is too thin
Thin drywall is more prone to shifting and loosening with age. It can cause the nails or screws to become loose and pop out of the drywall.
Shrinking or settling of the house
As a house settles, the framing can shift and cause the nails to pop out. It is more likely to happen in newer homes but can occur in any home over time.
Poor installation
If the nails are not driven in properly or spaced too far apart, they may not have a good grip on the drywall. After some time, they may get dislodged and fall out.
Water damage
Water damage can cause the drywall to swell and loosen. It can cause the nails or screws to become loose and pop out of the drywall.
Temperature changes
Temperature variations can cause nails to jump out and expand. It is most likely to happen in homes with poor insulation or in areas with extreme temperature swings.
Using too small nails
If the nails you use to secure the drywall are too small, they may not have enough grip to hold the heavy sheets in place. Over time, the weight of the drywall will cause these nails to loosen and pop out.
Using too few nails
Even if the nails are the right size, if there aren’t enough of them used to secure the drywall sheets, they may still loosen and pop out over time.
Vibrations around the house
Things like loud music, slamming doors, or nature (like an earthquake) can cause vibrations that loosen the nails and cause them to pop out of the drywall.
How to Repair Nail Pops in Ceiling in 7 Steps
Nail pop repairs are a relatively simple DIY task that anyone can complete. All you need is a few tools and materials, which you can find at your local hardware store.
Tools and Materials Needed
- Hammer
- Nail set
- Drywall screws (1 inch)
- Drill
- Screwdriver bit
- Paintable caulk
- Paint (optional)
- Sandpaper (optional)
Step 1: Identify the Problem Areas
Search the entire ceiling for any noticeable burst nails. Look for little, raised bumps on the drywall’s surface. Pay special attention to the joints between drywall sheets, as this is where nail pops are most prone to appear.
When you have located all the nail pops, draw a small mark on the wall next to each one using a pencil or marker.
Step 2: Drive the Nails Back In
Once you’ve identified all of the popped nails, it’s time to start driving them back in. To do this, use a hammer to tap the nail back into place gently. Ensure that you don’t push the nail in too far, as this could cause the drywall to crack.
If the nail doesn’t go back in quickly, try using a nail set. A nail set is a small tool that helps to drive nails into difficult-to-reach areas. Simply place the tip of the nail set over the head of the nail and tap it with a hammer to move the nail into place.
If the nail refuses to budge, you may need to slightly enlarge the hole with a drill before attempting to drive the nail back in.
Step 3: Remove the Old Drywall Screws (if present)
In some cases, you may find old drywall screws in addition to the popped nails. In this situation, you must remove these screws before continuing.
To do this, simply use a drill to loosen it and remove it by hand. Take care not to damage the screw’s head, as this will cause pulling it more challenging.
Step 4: Insert New Drywall Screws
Put new screws in whatever holes you drilled out in the previous step. To do this, simply drill a pilot hole in the drywall next to each popped nail. Start by using a smaller drill bit to create a shallow hole. Ideally, the diameter of the pilot hole would be just smaller than the head of the drywall screw.
After drilling the pilot hole, insert the drywall screw and tighten it until it’s flush with the surface of the drywall. Avoid over tightening the screw since this may cause the drywall to break.
Step 5: Caulk the Screw Heads
It’s a good idea to caulk over the heads to help prevent future nail pops. Apply a bead of paintable caulk around each screw head, smooth it out with a putty knife, and then remove any excess with a damp rag.
Allow the caulk to dry completely before proceeding.
Step 6: Paint the Screw Heads (optional)
You can paint around the caulked screw heads if desired. This step is also optional, but it’s a good idea if you want to create a uniform look.
Put some paint on the surface around the nail pops. If necessary, you can also use sandpaper to smooth out any rough edges.
Step 7: Enjoy Your New, Pop-Free Ceiling!
That’s it! Once the caulking and painting are complete, you’ll have a ceiling free of unsightly nail pops. Enjoy your new, beautiful ceiling!
How to Prevent Nail Pops in the Future
Fortunately, you can take specific steps to lessen the likelihood of future nail pops.
Use more nails or screws – When installing drywall, use more nails or screws than the minimum required. It will help to prevent drywall from moving and cracking over time.
Use thicker drywall – Thicker drywall is less likely to shift and loosen over time. If you’re concerned about nail pops, opt for thicker drywall (5/8 inch or greater).
Attach the drywall to furring strips – Furring strips are narrow wooden boards attached to the studs before the drywall installation. It will create a more stable surface for the drywall and help to prevent nail pops.
Use longer nails or screws – Longer nails or screws penetrate deeper into the studs, making them less likely to loosen over time. If you’re concerned about nail pops, use 2-inch or longer nails or screws.
When A Nail Pops Need a Professional
Though repairing nail pops is a straightforward process that most homeowners can do themselves, there are some cases where it’s best to call a professional.
If the nail pops are numerous or widespread – If you have more than a few nail pops, or if they spread out over a large area, it’s best to call a professional. The job will likely be too time-consuming for the average homeowner.
If the ceiling is sagging – If the ceiling is sagging, it’s a sign of a more severe problem. Typically this is the result of structural deterioration or water damage. It is crucial to call in an expert in these cases to have a look and make any necessary repairs.
If you’re not comfortable repairing yourself – If you don’t feel confident in your ability to repair, it’s best to call a professional. It is because a poorly done repair can make the problem worse.
Final Words
Knowing how to repair nail pops in ceiling is a valuable skill for any homeowner. Although the process is relatively simple, it’s essential to fix it properly to avoid worsening the problem.
It is best to have a professional involved if the problem is severe or if you are unsure of how to fix it. Otherwise, following the steps in this guide will help you fix those annoying nail pops in no time.